And no I haven't forgotten about new videos!
It hasn't slipped my mind that a number of new videos are on the horizon showing you guys my videography setup, going through the equipment and techniques to set up for a reliable interview scene using the new Rotolight LED ring light and the Rotolight microphone. The weather has been terrible here over the last week so I haven't had a chance to get out and do much filming and testing out of the new Rotolight products, but this is the job for today and next week!
Watch this space for plenty of 'Video Questions' videos and samples using the Rotolight kit!
Panasonic announces the GH4 - 4K DSLM movies!
Check out the specs of the new model here - http://www.panasonic.com/uk/consumer/cameras-camcorders/lumix-g-compact-system-cameras-dslm/dmc-gh4heb.html
![DMC-GH4HEG-Product_ImageGlobal_Europe-1_de_de[1]](http://ajp1991.files.wordpress.com/2014/02/dmc-gh4heg-product_imageglobal_europe-1_de_de1.png) Photo from Panasonic website.
Photo from Panasonic website.
Looks very impressive, but as usual a highly compressed Youtube product demo doesn't do it justice.. For all those interested in having the extra resolution to work with, as well as a newly developed MOS sensor then this camera may be your first port of call instead of the previously available Canon 1D-C.
It will be interesting to see how the industry responds to this new release, as many more productions working in a higher res to downscale later.
What interests me about it, is not only being able to capture footage in 4K/2K, but also 1080p HD slow motion at 50 and 60fps. My main drawback at the moment is using the 5D mark III setting of 720p for 50fps, which is fixed at that resolution. The higher bit-rate is very appealing too, despite recording in MOV file formats 100Mbps is a great advantage over the highly compressed Canon DSLR movie output files.
Lots of points to consider, and no mention of a price yet.. Hopefully Panasonic will be at BVE so I can get my hands on this bad boy!
Fantastic Sony PMW-300 Review
Following on my post about camcorders yesterday, here is a great review of the Sony PMW-300 camcorder from Shooting Image Ltd - http://www.shootingimage.co.uk/MoreInformation/SonyPMW300/SonyPMW300.html
![Sony-PMW300-Large-e1371403796121-616x486[1]](http://ajp1991.files.wordpress.com/2014/02/sony-pmw300-large-e1371403796121-616x4861.jpg) Photo from NoFilmSchool.
Photo from NoFilmSchool.
Video Questions; Choosing the right camera, picture profiles and using ND filters!
Heyo all! Thanks for sending in your questions, I will try to answer as many as I can will practical, real world examples! If you have any more, please send them my way! Question from Chris via Facebook: "Can you recommend any camcorders for HD video and good low light performance?"
Answer: A DSLR for video is not the right choice everytime. Why do you think television broadcasters use camcorders and system cameras? For broadcasting, there are regulations and legal limits that must be followed for the final video to be shown live; there are many including the compression of the video signal, the black and white level (check out waveform monitors and video signal) to name a couple. DSLR's do not adhere to these regulations hence we don't see TV crews running around with 5D's in London.
Where DSLR's produce a great image due to the large CMOS sensor, they have big restrictions such as needing to change lenses, poor audio support (unless you invest in audio equipment), rolling shutting, aliasing, moire.. I could keep going.
So, taking camcorders in the equation; most have long zoom ranges (20x and more!) at wide apertures, with additional digital gain, in built ND filters, built in stereo microphone and audio in/out. The sensors are different too, some using CCD (which splits the 3 colour channels) for better colour rendition and less compression.
These days, manufacturers such as Sony, Canon, JVC produce ENG (electronic news gathering) camcorders with those above features, meaning no extra kit to carry, most are hand held or shoulder mount for ease of use. Therefore it is seemingly easier to video on a camcorder, until you require a large sensor camera for artistic video.
Product recommendations for camcorders - Sony AX and VG range, Canon Legria, XA and XF range, JVC produce great camcorders too and have stepped up their game over the last year with the GM-HY range including a 4K model too.
If you want to spend a little more, the Sony HXr-NX3 (recently reviewed by Den Lennie) looks incredible for what you get in one camera - http://www.sony.co.uk/pro/article/broadcast-products-get-close-up-hxr-nx3
Next question from SAHIB on Twitter: "Do you use a neutral picture style when shooting, and do you use neutral density filters?"
Answer: For those unaware of picture profiles on your camera, check them out in the 3rd section of the movie shooting (red) menu (for Canon users). There are a number of options listed, which alter the way the picture is recorded depending on your choice, you can also customize these profiles too using the INFO button.
Canon picture styles - Standard, Portrait, Landscape, Neutral, Faithful, Monochrome.
I will not be detailing the ins and outs of all the picture styles, more of a visual comparison.
What does a picture profile do? Much like LUTS, picture styles adjust the intensity level of the; Sharpness, Contrast, Saturation and Colour Tone in the image, so what picture profile you use can change the 'look' of the video you capture.
Check out this video I put together today showing the results of the cameras picture profiles, and others I have loaded onto the camera. You can see a clear change in the image, but it is subtle differences that will make your video work stand out.
I previously used the Neutral picture profile, customized to reduce the contrast, saturation and colour tone to produce a very grey and flat image. I was using this profile to achieve this look, as it is how RAW footage is captured to then be graded in post production. Neutral does replicate this 'flat' look, but after doing research into other profiles, Neutral reduces the data that is required in the picture (the contrast and saturation) that I would then put back in in post. This causes noise to be generated in the image, and can cause it to look unnatural and crushed, as the contrast and saturation that had been removed by the picture profile is being added back in later in the workflow.
That was long, but I hope it makes sense. If you compare the 'Standard' to 'Neutral' there is an evident drop in saturation and contrast, with a loss of detail in the top of the trees. If you compare 'Neutral' to 'VisionColor', there is an increase in saturation and contrast in the shadows and highlights.
The 'Neutral' picture style, similar to Technicolor CineStyle reduces the data the sensor captures, so I would not recommend using it if you plan to do colour correction and grading in your workflow. REMEMBER - whatever you capture when out filming will 'burn in' the detail, colours, sharpness and contrast into the image, making it harder to edit and remove unwanted errors. So, it would be better to use a profile that holds the data and detail so if wanted, you could work on grading the footage later.
From tests and experimenting, I favor the VisionColor profile; it is not as destructive as Neutral, holding colour and contrast without making the image flat. I definitely recommend checking them out here.
Next Question from SAHIB on Twitter: "Can ND filters change the style of video?"
Answer: This does depend on what and where your video shoot is. If you are working indoors, or with lighting that can be controlled by you then neutral density filters may not be required as you can alter the brightness of the scene by reducing the intensity of the lights. However, if you're out filming in a situation where you have little to no control over the lighting, then ND filters are key.
Personally I use variable ND filters, currently from Polaroid but much better filters are available from Hoya & Tiffen. The function of these filters is to reduce the light entering the lens, meaning camera settings can be kept the same. This allows you to follow the 180 degree shutter rule, which means keeping your electronic shutter speed at 1/50th to reproduce film-like and realistic motion blur.
So, with your shutter speed locked at 1/50, and your chosen aperture has been set, the only other exposure altering options you have is to ride the camera ISO to make the image brighter or darker.
PROBLEM!
With a fast aperture of F/2.8, and you are currently shooting in sunny daylight, your image is going to be very over exposed. Reducing the aperture to F/8 or F/11 may correctly expose the image but you have lost your depth of field! What to do!
Get some Variable ND Filters!
These ND filters rotate, allowing a variable ND amount to be set externally, without changing your cameras settings! This means that you can keep your cinematic depth of field and realistic motion blur without reducing the shutter speed to 1/250th or your aperture to F/11.
I recently shot this video using an ND filter on an 85mm T/1.5, which allowed me to shoot continually at T/1.5 for extreme shallow depth of field.
Making a quick edit: Variable ND filters are one of many options. ND Filters also come in stops; increasing by a factor of doubling so 2, 4, 8 etc. If you can stretch to separate stop ND filters they work just as well, and with the lower end (under £100 products) they will be better quality than one under £100.
In videography and cinematography, ND filters are applied in the matte box in front of the lens. So if you plan to use one, look in to matte boxes with the ability to add filters, but prepare to pay for it!
Well, that covers Video Questions for today! I hope to have answered and covered all bases, and remember they are from my personal knowledge and experience.
Got any more? Send them my way!
Planning a product promo + review shoot!
I've been working on the plans for a number of videoshoots to test out the awesome Rotolight mic and LED ring light. As the kit works especially well with people and subject focused shots, I am orchestrating a model/fashion/lifestyle shoot to show off the equipment to its full potential.
 (Photo from Rotolight website - Rotolight and Jason Lanier)
I spent the morning trawling through various fashion sites, blogs and Pinterest for inspiration on make up, clothing and models. I've never used it before, and from my experience it is a great resource for mass data collection. (The reason I'm not signed up to Pinterest is due to its Terms and Conditions). Building up a mood board, I've narrowed down some ideas and will spend tomorrow wandering around my town to find unexpected gem locations!
If you know any models; male and female, make up artists, fashion designers that would be interested in collaborating then please get them to contact me!!
I've had this idea in my mind, of a young woman running toward the camera as it tracks backwards, she holds her shirt together around her chest, hanging on to lace summer sandals. Cuts to her feet as she skips to slip her sandals on, slow motion playing a big part here.
Close up of her glorious smiling face as she races forward, her hair like silk in the wind flowing as she exits the frame. Tracking behind, as the young woman continues her path, into the horizon and out of focus as the camera slows and tracks high in the air.
(Ideas Intellectual Property of Adam Plowden 2014) muah!
That is all your getting for now, a teaser while I magic up the rest!
I'll be posting later about the questions I got via Twitter and Facebook; choosing your camera - is a camcorder an option for you? As well as analyzing picture profiles and how using filters can help your video! Much more to come, so share!
Little leak from B&H.. ZOOM H5
I've stumbled across a leak from B&H photo detailing a new ZOOM handy recorder; H5.

Will be interesting to see how this works with the current Tascam DR-60D and DR-100mkII recorders, however I do know the H4N does have a number of problems, maybe it was time for an upgrade.. It is a sigh of relief for videographers, bands, journos who don't need the 6 channel power of the H6 but would like the option of external XLR/TRS microphone/device inputs.
Check out the article here - http://news.doddleme.com/equipment/zoom-announces-h5-handy-recorder/
A romantic video experience with Manfrotto gear (How to choose the right tripod and head).
When you start working with a piece of equipment time and time again, you build up a relationship with it; understanding its ins and outs, the fastest or best way to set it up. For me, I have this affinity with Manfrotto products. Since starting out in video during university, I had invested in a sturdy Manfrotto 055Pro-B tripod and a fluid video head. 3 years on and to this day it proves to be a great piece of kit to have around; I use it for my custom built camera jib now so it lives in my boot with that!
Through various university and freelance projects I used my trusty MF 055Pro-B legs, strapped tightly to a Lowepro backpack.. Not the most comfortable or lightweight solutions. The aluminium legs begun to take their toll when more equipment was required too, and as a videographer I had a bag full of lenses, audio kit and a monopod too. I occasionally used a Glidetrack slider too, which worked very well on the legs, and did not have to be spread really far apart or use any weights.
Check out a couple of my video's featuring Manfrotto gear -
Manfrotto Backpack50 - http://vimeo.com/84398932
Manfrotto ML240 LED - http://vimeo.com/41688532
But, how do you choose the right Manfrotto tripod and video head for what you do?
Key points to consider - Budget is always something to keep in mind, it can get expensive!
- What cameras, lenses and accessories you will be using with it.
- Where/shooting situations; are you going to be traveling so need a lightweight option, or more corporate indoor, weddings, adventure.
- Are you working with video or photo, or both!
Budget - everyone should have a decent set of tripod legs and head that can be their go-to choice no matter what the client, production or location. This could be a heavy duty two-leg tripod with video fluid head for news/docu/TV footage acquisition - go for Manfrotto twin leg kit! But for photography you may consider a lighter option that can be grabbed and carried quickly - go for Manfrotto BeFree! Remember that a tripod/head kit should last you a lifetime so keep your budget in mind, and look for products and kits around £100-£150 for your first investment (no, I'm not suggesting you save up to spend £150, your budget is what ever you can work within so have a rough max figure that you would aim to spend - dependent of the following..).
Cameras, lenses and accessories - If you are a keen amateur, you may be working with small DSLR bodies and lenses; like the Canon 600D with an 18-135mm for example. This setup not weighing much tends to lean you towards a light, single leg tripod with a two way or ball head mount - 180X Pro B with 804RC2 head. However, for more professional setups; Canon 5D mark III and a 70-200 telephoto lens your looking at +3Kg of weight, so a more stable solution needs to be found - Lightweight Fluid System.
Shooting situation - If you are out and about all the time, a tripod with locking legs and extendable center column is a great feature to have; its great for getting very low angle shots while keeping the tripod steady, not to mention the ball leveling mount feature which levels the head without adjusting the legs. If you are the opposite, and work in studios and generally terrain free environment, a standard set of legs will be appropriate. Remember you can mount the tripod onto dolly wheels for easy motion and movement in a studio or indoors.
Video or photo? Generally video requires the use of moving or 'tracking' shots, where the camera focuses and follows a subject through a scene. Remember talking about ball and fluid heads? This is where they become important! A fluid video head uses liquid to smooth the panning and tilting movement when adjusting the head, creating smooth camera movements. This is not entirely possible using two-way or ball heads due to the lack of fluid in the head and a pan handle. It can be done, but be prepared to video a number of times to achieve steady movement! If you look further into video and movement, many equipment manufacturers have also created stabilizers that counter balance the camera's weight, creating flying and smooth flowing movement!
For photo, as you are taking still images, the focus on being able to move the camera while the shutter is open diminishes, and the need to find and focus on a subject quickly, from many angles becomes key. This is where a ball head or two way head works best, allowing quick movement between camera angles.
If you mix between both, producing work like timelapse, hyperlapses, long exposures and night time shooting, you should consider the weight of the tripod and camera gear together; will you need to weigh down the tripod to keep it steady, will the camera be subject to movement when using a lighter tripod and head? These factors will affect your image or video if not considered!
A great example; myself and Ashleigh were filming a wedding at Horsley Towers for John Harris Wedding Films and we got the message to setup and run a timelapse for the evening. It was windy out, not great conditions for a TL, and with only a Canon 60D and 15mm fish eye lens the setup was not at all weighty. After about 15 minutes I went to check on the TL camera and it was nowhere to be seen.. The tripod and camera got blown over (not damaged) in the wind. No more timelapse that day!
Hope that helps in your choice of Manfrotto kit to use! It's always good to examine the details of your needs and what the product can do, to find the best solution. Remember if you start out with a single-leg, ball head setup and are looking to move into video in the future, you may need to invest again. Its not always possible, but try to future-proof your investment in case you have a change of heart in what you do.
The reason why choosing the Manfrotto 055ProB tripod and 701HDV worked so well for me is that I could use it on everything I worked on; from being my A camera support to supporting a camera jib and slider - an all round solution to my needs.
Back to the story.. After 3 years, it was time to move on. I had been researching equipment I would invest in, and sticking with the DSLR camera type my requirements for tripod legs and video head did not stray too far away from my original purchase. However, after experiencing carrying around all of the video equipment, and an extra bag for grip, it was about time I got a carbon fiber tripod to ease the weight issue. As I am a one man band videographer, I carry all the gear. So with a full camera bag, tripod, monopod, even a slider maybe, my options need to be lightweight but just as functional.
Manfrotto have gone above and beyond on the engineering of the 755CX3 and MVH500AH. Carbon fiber legs provide an ultra portable solution, able to hold loads up to 8Kg which is perfect for my Canon 5DmkIII, cine lenses, field monitor etc.
The new plate mount on the video head is incredible too, and saves so much faffing around with the previously notorious screw to lock the plate in place. Now, the plate simply slides in from above, and a spring pings the clamp into place. A great innovation especially for use with camera rigs so you don't have to bend down, find the screw to start unlocking the plate and camera to the rig. So, for fast shooting situations, the new head is a must!
The sad thing about all of this is that after searching through my old photos and videos I don't have any; specifically featuring the Manfrotto gear! What I can say though, is for every single videoshoot I've worked on, my Manfrotto gear has been there, supporting me no matter of the situation. So I went out a shot some stills that I've included in the blog, and did indeed find pictures of the gear in action!
If you want to see more of my work featuring Manfrotto equipment, check out my vimeo page - https://vimeo.com/apvideography
They say you should only by a set of legs once, make the right choice, make it Manfrotto! Like this post? Share it!
Awesome day at Warner Bro's Studios for BSC Expo!
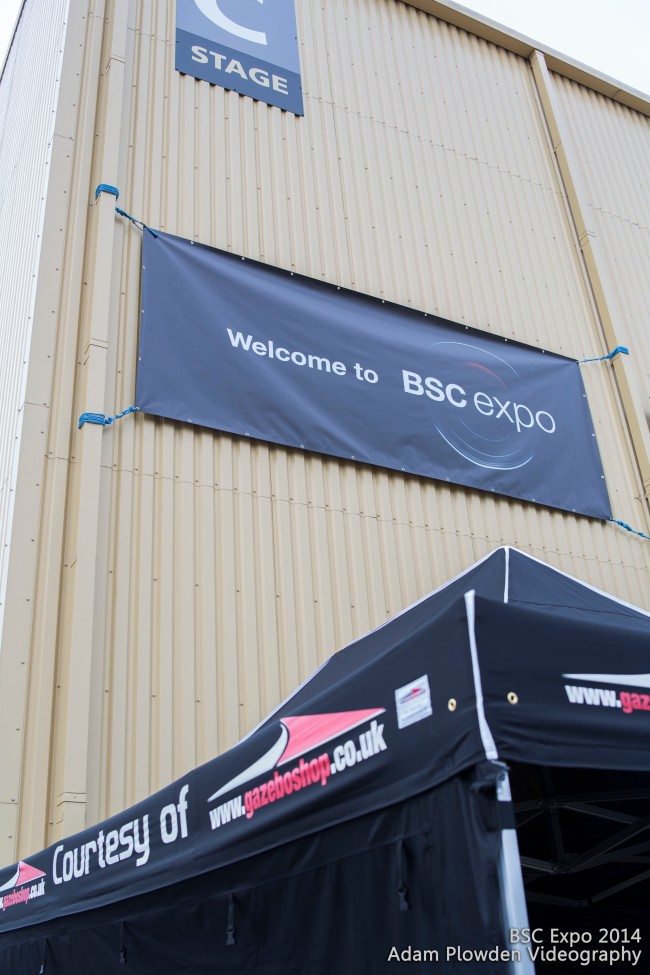
It's been a great day at the BSC Expo; based at Warner Bro's Studios Leavesden the expo features the worlds newest and best cinematography technology and workflow solutions. The journey was easy, I flew by Wycombe to pick up Glen and we made our way to the studios, then walked to C stage. We could see the Harry Potter studio tours in J and K on the other side of the lot, but it was huge!
We took a slow stroll around the stands, it was great to see Rotolight who produce LED lights for photo and video. Their 'Rotolight' product is incredible for a pocket beauty light; due to its circular design the light gives soft overall coverage of the subject, and for models its perfect for achieving a ring of light in their eyes. As well as that, they have developed their own on camera microphone too, giving photographers and videographers alike an entry package, I'm very happy to see this!
The RED stand had the RED DRAGON on display, demoing the 6K, wireless focus and zoom, touch-control monitor.. I can't wait til shoot with a RED package, think it will be be some time though!
The Panavision motorized camera axis was a jaw dropper too, I was so interested due to planning on constructing my own as a DSLR gimbal solution. There is no way I could achieve the precision and accuracy of this device, but with some smooth stepper motors it is completely possible! (If you can't buy it, then try making your own; it worked for me with a camera jib and camera rig!).
And no, we weren't at the Harry Potter Studio tour...
As Bucks New Uni is on the way back to Surrey for me, we stopped by Wycombe for a drink in the SU, the last time I was there we were completely smashed.. "F****ng absinthe death" aye Glen!!
Awesome day, so happy I got to see Glen too, thought I was going to have to wait until March!
For those interested in visiting BSC: GO, it is a great expo completely for cinematography so think cameras, lenses, grip (steadicam, jibs, cars etc), lighting (and plenty of great LED innovations from Digital Sputnik and Chroma Q) so definitely check it out!
Quiet Sunshine
http://vimeo.com/84790518
Capturing local beauty
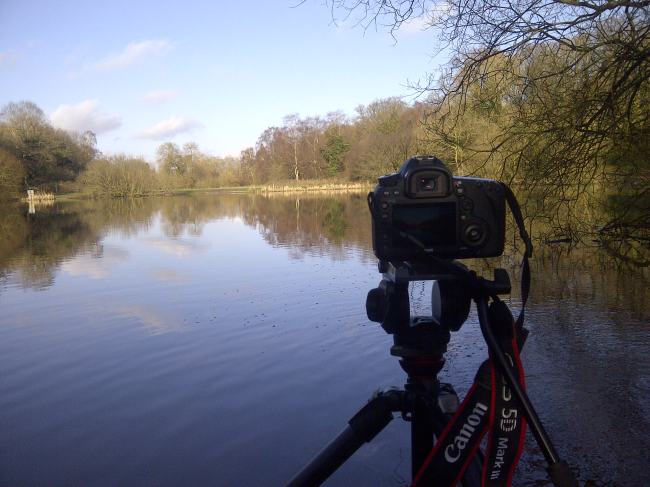
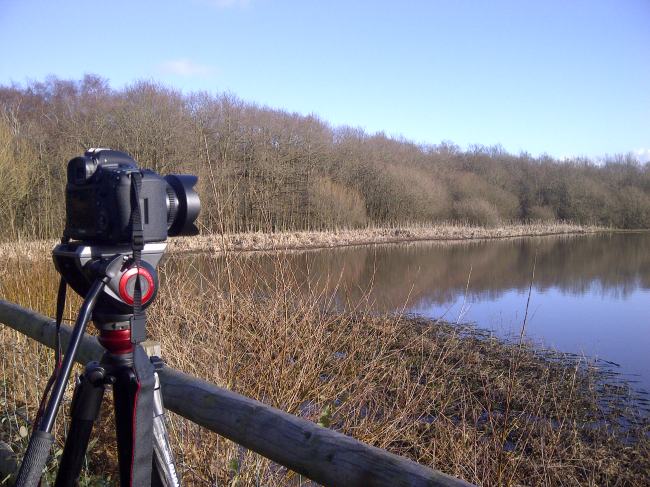
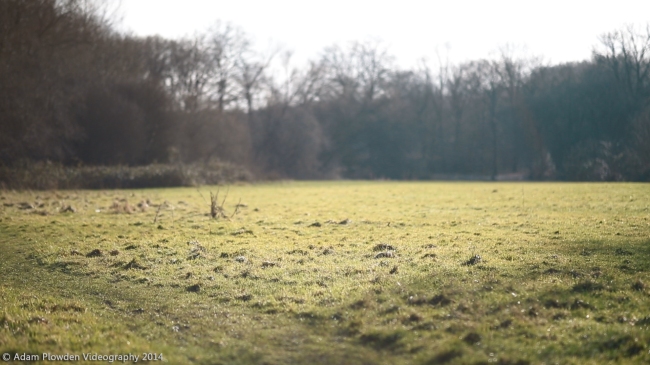
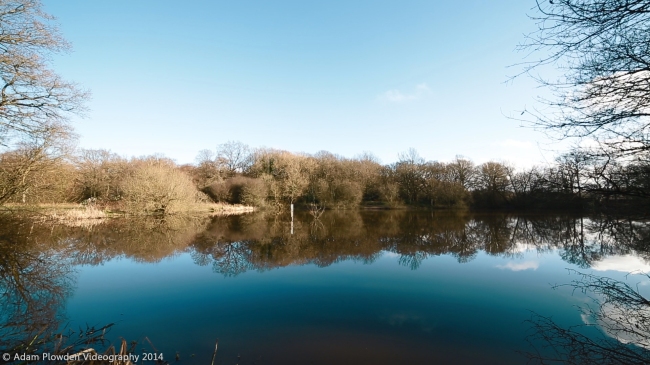
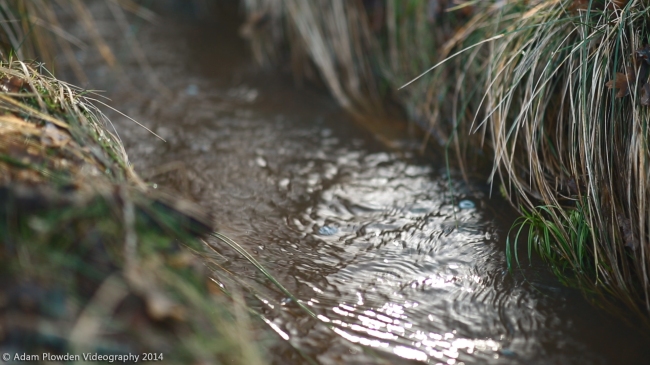
Film making and videography isn't all about big budget productions with expensive kit. Its great to take time out to see what stories you can tell and images you can capture in your local area. Luckily for me, I live in Surrey which is full of green spaces. My chosen location for today's adventure was Epsom Common, I used to and hope to continue fishing at the lake. Since being a kid I remember it being a beautiful place in the winter, so despite the recent flooding I made my way down!
Accompanied by the awesome Manfrotto 055 Carbon Fiber tripod and 055AH video head; my grip was sorted in a lightweight solution. I took my whole kit bag in case I wanted to record some foley audio or shoot on a range of lenses. I tried to stick to the Samyang Cine lenses I have (14mm, 35mm, 85mm), so I can test them out on a range of shoots. I also came across a 72mm variable ND filter that fits onto the Samyang 85mm, which means I can achieve T/1.5 and a beautiful bokeh in broad daylight.
As you may have previously read, I also installed some new picture styles on my camera from VisionColor, today I used Cinelook to see what the footage looks like out of camera, without grading. So far, without adjustment the picture was punchy with a good colour tone present, not flat and neutral like I previously used. It certainly has given the footage a baked in 'look' while recording which will definitely speed up the post-production process.
It was great being in the outdoors, I often spend way too much time on the computer and neglect our very green, rural backyard, which deserves to be appreciated, remembered and captured in moving image.
I've processed all of the footage now, using most of what I shot. It is simply put to music, in this case the serene 1:1 by Brian Eno, which was very fitting for the scene. I have applied no colour correction, grading or effects to the clips whatsoever, to demonstrate the cinematography at hand.
I will post the link up later!
I hope you like it, and please share around!!
All new promo video is out now!
Now SWPP is over for me, I am free to release the 'Behind The Scenes' videos I shot down in Falmouth! Here is the second video; a model videoshoot using Canon, Manfrotto, Elinchrom equipment. Please like and share :) http://vimeo.com/84036470
Strategic grading with 'burnt in' footage.. Canon/Manfrotto/Elinchrom Promo for SWPP Conference 2014
I continue to work on the promo videos for Canon/Manfrotto/Elinchom today. After shooting the material in a 'neutral' picture style, there was still a lot of contrast, sharpness and saturation in the image. This has caused a couple of problems with the adjustment of the levels and colours when grading. Burnt in footage is where detail is lost due to a crushed dynamic range, out of focus picture, or a mis-interpreted colour balance (and plenty more). This footage is notably harder to work with due to the loss of detail; and when you come to colour correct or grade the shots, life becomes more difficult as hues and light levels are burnt in to the image. Applying numerous filters and effects to remedy this can only add noise and grain, and degrade the footage so it is important to remember to flatten the image before shooting!
Even with a neutral picture style selected, the internal settings for contrast, saturation etc sometimes remain the same, so remember to go into the picture style settings and set them all to the lowest. This will achieve a flat picture which is much easier to work with in post. For those who don't wish to apply heavy corrections or grading to your shots, shooting in neutral will work fine too, just add contrast when editing to remove the gamma grey curve and punch out the sharpness!
I've had to resort to black and white images for some shots due to burning in detail in low light shooting situations.
Here are some example frames of what I have been working with, and how I have graded them.
These are the frames from the second video. I was in a studio conversion for the MUA part, and Bjorn's place for the shoot. White balance wise it was cool, and when shooting directly into the the window I got a lovely hazy light effect.
We shot the first part at Gylly beach in Falmouth with Carly who runs an extreme fitness group called BootyCamp. Going for a gritty, filmic look for the gym part I used negative bleach bypass. For the beach, I tried to add some drama to the already crashing sea, unluckily for us it was freezing cold so we weren't up for staying there for long.
Captured with the Canon 5D Mark III, Tamron 24-70 F/2.8 VC, Sigma 70-200 F/2.8 OS, Samyang 14mm T/3.1, 35mm and 85mm T/1.5. Post production in Adobe Premiere Pro CS6 and graded using the in built colour correction tools and Red Giant Magic Bullet Looks.
When all the components to my new editing system arrive I am going to be transferring the grading workflow to Adobe SpeedGrade instead of Magic Bullet due to its ease of use, features and tools for cinematic grading as well as having an accelerated 2GB GPU with CUDA graphics... :D
The videos will be released next week on Vimeo, so watch this space for updates! If you can't wait until then, get down to SWPP on Saturday where I will be showing the video with Bjorn and talking about working with video on DSLR!
This gives you a bit of an example of what I've done to work with footage that has some lacking detail, creating a visual style to convey the subject of the video.
Interested in more of what I do? Check out my website, follow me on twitter, watch my videos! Oh and please share my blog and website if you can :)
Got any questions? Send them my way!
[contact-form][contact-field label='Name' type='name' required='1'/][contact-field label='Email' type='email' required='1'/][contact-field label='Comment' type='textarea' required='1'/][/contact-form]
Stills Copyright Adam Plowden Videography 2014.
Manfrotto Backpack50 Video.. It's taken its time!
I've finally got around to working on the Manfrotto Backpack50 product video that I shot back in November with Glen and Sam. I made the most of the beautiful 'golden hour' to capture unique images of the product in use. The shoot location was our usual hotspot for kit testing; Epsom Downs.

The Backpack50 is an insanely good bag, dedicated to protecting your prized possessions and increasing your productivity when out on a photo or video shoot. Aimed at both professional videographers and photographers; the bag features plenty of space for multiple camera bodies, lenses and telephoto lenses. For the on-the-go editor, you can also carry a laptop and a tablet with you, as well as strapping on a tripod. Your complete equipment in one bag. One solution.
I'm editing the footage in Premiere Pro, to achieve that awesome bokeh I used a Nikor 50mm F/1.4 manual lens and shot handheld, so I will be applying some stabilization to those shots. Because of the strong sunlight, I worked with that light to determine the exposure of my subject, Glen. Essentially putting him in a silhouette, defining his and the backpacks shape. For the ambient settings I was working with, I believe this worked well, and is a good technique to try when shooting in the golden hour!
However, when working with low contrast ratios (number of stops between black and white) it is easy to over or under expose parts of the image, which not only burns in detail but can cause problems when encoding and playing back the video, so remember to check your reference monitors and keep to legal limits!
More to come later!
I've started working on my showreel. Well.. Chopping up videos in a sequence.
Having an awesome time grading the behind the scenes videos for SWPP and Canon/Manfrotto/Elinchrom! Photo copyright Adam Plowden Videography 2014.
Colour grading to achieve a 'gritty' yet cinematic look.
As you know I filmed some great material for a Canon/Manfrotto/Elinchrom promo video, which is going to be shown at The Societies SWPP conference next week. Todays challenge was to grade one of the videos; here are a couple of screenshots to show you what I was working with. The first is my first grade, which I then changed shown in the second.
The colour balance was not good in the gym that we were shooting in, so try and overcome the warm/green hue I applied a blue tint to the image, as well as adding negative bleach bypass to give it that film process look. I then adjusted the grade, removing the blue tint as throughout the clips it did not look good all the way through. I then added a knock of contrast to enhance the colour and depth of the image.
The video will be available to watch possibly next week or the week after!
Video on the Canon 5DmkIII and Samyang Cine Lenses
Many of you intrepid videographers may have come across a unique range of VDSLR Cine lenses from Samyang (Rokinon/Walimex) depending on your region. Have you had thoughts to invest in one, or a whole range of them? Focusing on video, having electronic focusing and aperture is not essential for me, and in fact gives more control over the light entering the lens due to the de-clicked aperture. You can create smooth transitions between light and dark situations with ease by pulling the aperture.
As I've only just got the 5DmkIII and cine lenses, I thought it would be a good idea to test the kit out individually; producing a short video of the results.
I began on the Samyang 14mm T/3.1, an ultra-wide lens that does have barrel distortion if subjects or distinct lines move towards the sides of the frame. Operating the camera handheld on the MODA rig, I was not left much choice but to capture the video in 720p 50 frames per second, to eliminate obvious camera shake. This did work in my favor come later in the day when I was hanging out of a car boot filming!
To exaggerate the ultra-wide effect, getting close to the ground, walls or your subject will show how wide the image actually is, while offering exquisite sharpness throughout the depth of the image. Moving while operating an ultra-wide also gives a unique changing perspective to the viewer; one that is appealing due to it looking unnatural to our eyes - a great effect for establishing locations in film.
What I did notice was a very strong contrast, even when shooting in Neutral picture style (for a flatter image). This is causing issues in post due to burnt in detail in the highlights and shadows.. So I have adjusted the picture style to my needs by reducing all of the parameters to the lowest level.
Overall, I am ecstatic to finally get my hands on an ultra-wide as I had no way of achieving that perspective with my old kit.
My tips would be to keep the camera stable - use a tripod, shoulder rig or steadicam to operate the camera. This gives you better control and steady visuals that won't distract the viewer from the awesome visuals.
Judge your highlights and shadows correctly - this is a manual lens, so remember it is easy to stop down to F/6.5 or F/8.3 (uncommon electronic F stops) to expose the image perfectly. With this, always check your focus (use digital zoom!!). The worst thing ever would be to find an awesome flowing shot but it being slightly out of focus.
Experiment using the manual aperture, it will take some time to get used to!
Here is a draft edit that I chucked together from the test day -
http://www.youtube.com/watch?v=JN4tb8MJpEc
On to the Samyang 35mm T/1.5
This is a beautiful lens. I've only worked with a 35mm F/1.8 for my little Nikon D5000, so as far as experience with 35mm that goes out the window.
What can I say... The 35mm focal distance works so well with the 5D's full frame sensor, and even at T/5.6 the image was sharp and had a beautiful bokeh. To the other end of the spectrum; I also shot at T/22 to achieve a silhouette effect of Glen and the Houses of Parliament in the background. At this small aperture you would expect loss of detail and softness, but the Samyang 35mm excelled.
Another fantastic benefit of this lens is its minimum focus distance (the minimum distance from the lens to the subject for it to be in focus). It is very small at only 30cm allowing you to get very close to the subject and still achieve pinpoint sharpness and shallow depth of field.
I was filming up in London with my friend Glen, the light was hard when we arrived with strong sunlight beaming through the rain clouds, so to retain good exposure throughout the frame I found myself shooting between T/4 and T/8, varying the ISO depending on the location. For demo purpoes, I also filmed Glen constructing and using the new CamSmart MODA Rig, in innovative new video and photography product aimed at all level of users to achieve exceptional visuals in a cost effective solution.
For this close up, intricate video the 35mm lens was perfect for both wide and close up shots, I get more and more impressed as time passes!
My tips for using the Samyang 35mm T/1.5 cine lens - get yourself some ND filters, or even better variable ND filters as this will reduce the light entering the lens without changing the aperture, shutter or ISO. If you have a lens that is very fast, like this model at T/1.5, to retain a shallow depth of field in a multitude of locations and light levels ND filters are crucial and should be in your kit bag.
Here is the rough edit of the 35mm film! -
http://www.youtube.com/watch?v=g66CTm38SsA
Big shout out to Manfrotto for the 055CF tripod, video head and pro backpack, makes a world of difference to my old 055 aluminium model!
Good luck with your shooting, drop us a comment if you have any questions about using the lenses or kit, and be sure to like, follow and share!!
Colour grading? Check this out
A helpful checklist/guide to those embarking on colour correcting and colour grading for DSLR video - http://www.hurlbutvisuals.com/blog/2012/01/7-tips-for-hd-color-correction-and-dslr-color-correction/
Off to film a wedding with John Harris Wedding Films!
Excited for the first wedding of the year at Horsley Towers! We're filming Cupcake-a-licious owner Laura's wedding, lets hope the stormy weather holds off!


![8-forest-road-landscape-photography[1]](http://ajp1991.files.wordpress.com/2014/02/8-forest-road-landscape-photography1.jpg)




![1464738_10153571677610510_1940877368_n[1]](http://ajp1991.files.wordpress.com/2013/12/1464738_10153571677610510_1940877368_n1.jpg)


